


PowerToys is a suite of utilities for power users on Windows, and one of its most powerful tools is PowerRename. This utility allows you to batch rename multiple files or folders quickly and efficiently using advanced search-and-replace functionality, regular expressions, and more. Whether you’re organizing photos, cleaning up downloads, or managing project files, PowerRename can save you a ton of time. Here’s how to use it:
Step 1: Install PowerToys
Before you can use PowerRename, you need to install PowerToys on your Windows machine.
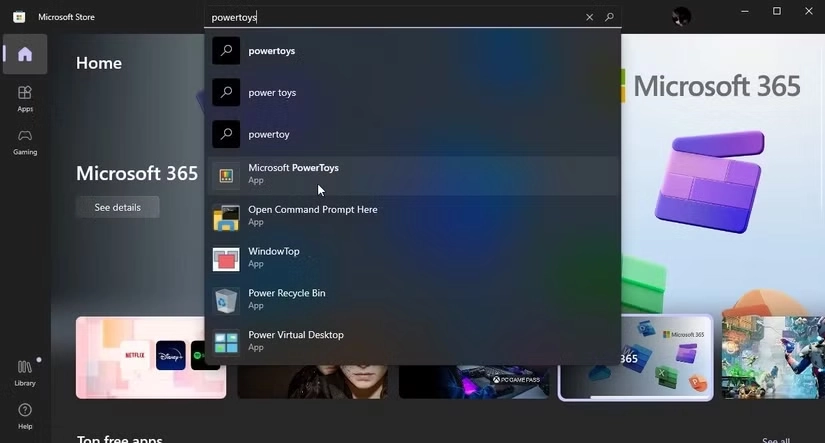
- Download PowerToys:
- Go to the official PowerToys GitHub page: https://github.com/microsoft/PowerToys.
- Download the latest release (either the installer or the standalone executable).
- Install PowerToys:
- Run the installer and follow the on-screen instructions.
- Once installed, PowerToys will run in the background, and you can access its utilities from the system tray or the PowerToys settings menu.
Step 2: Open PowerRename
There are two main ways to open PowerRename:
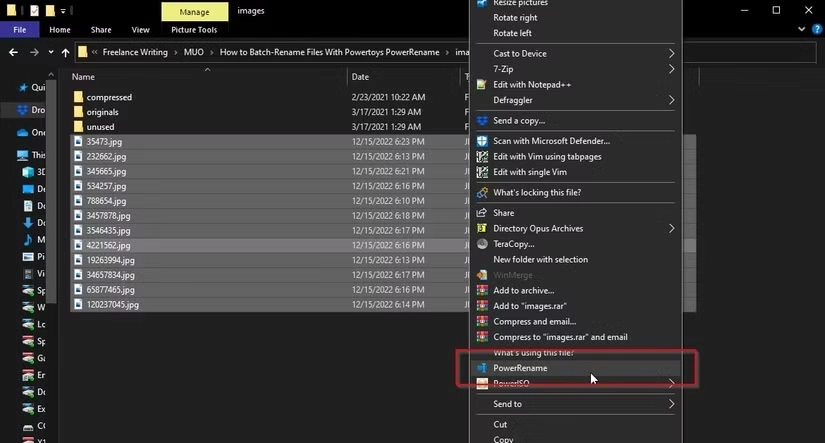
- Right-Click Method:
- Select the files or folders you want to rename.
- Right-click on the selection and choose “PowerRename” from the context menu.
- PowerToys Settings:
- Open the PowerToys app from the system tray or Start menu.
- Navigate to PowerRename in the sidebar.
- Toggle the switch to enable PowerRename if it isn’t already.
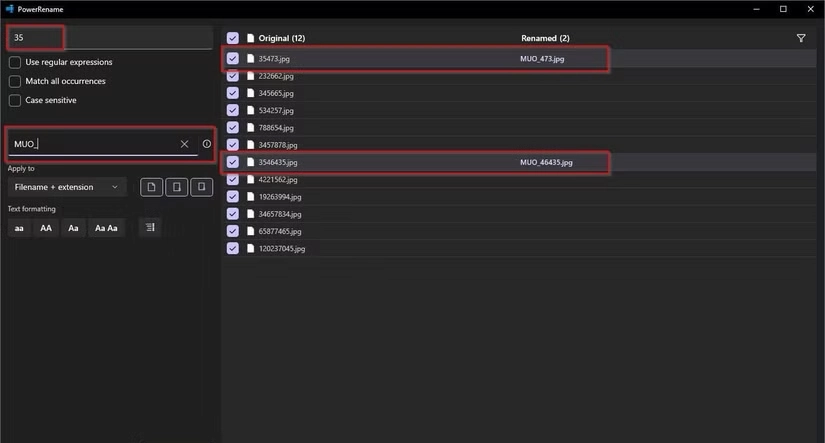
Step 3: Understand the PowerRename Interface
When you open PowerRename, you’ll see a window with several options:
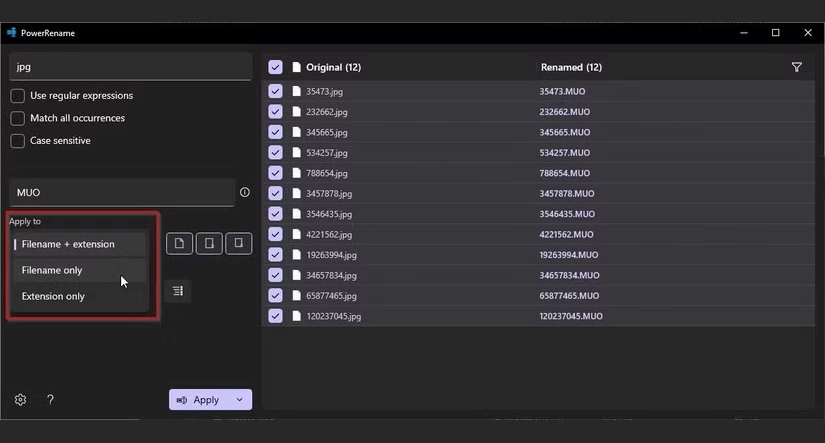
- Search for: Enter the text you want to find in the file names.
- Replace with: Enter the text you want to replace it with.
- Use Regular Expressions: Check this box if you want to use regex for advanced pattern matching.
- Case Sensitive: Check this box if you want the search to be case-sensitive.
- Match All Occurrences: Check this box to replace all instances of the search term in the file name.
- Exclude Files/Folders: Check this box to exclude certain file types or folders from renaming.
- Preview: A list of files with their current and new names, so you can see the changes before applying them.
Step 4: Rename Files
Here’s how to rename files step by step:
- Select Files:
- Highlight the files or folders you want to rename in File Explorer.
- Right-click and choose PowerRename.
- Enter Search and Replace Terms:
- In the Search for field, type the text you want to replace (e.g., “IMG_”).
- In the Replace with field, type the new text (e.g., “Photo_”).
- Adjust Settings:
- Enable Case Sensitive if needed.
- Enable Match All Occurrences if you want to replace every instance of the search term.
- Enable Use Regular Expressions for advanced renaming (more on this below).
- Preview Changes:
- The Preview pane will show the current and new file names.
- Review the changes to ensure they’re correct.
- Apply Changes:
- Click Rename to apply the changes.
- A confirmation dialog will appear. Click Yes to proceed.
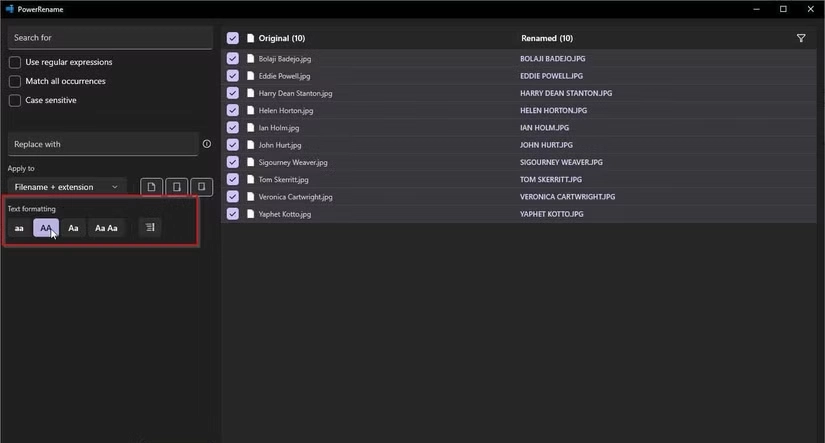
Step 5: Advanced Features
PowerRename is incredibly powerful when you use its advanced features:
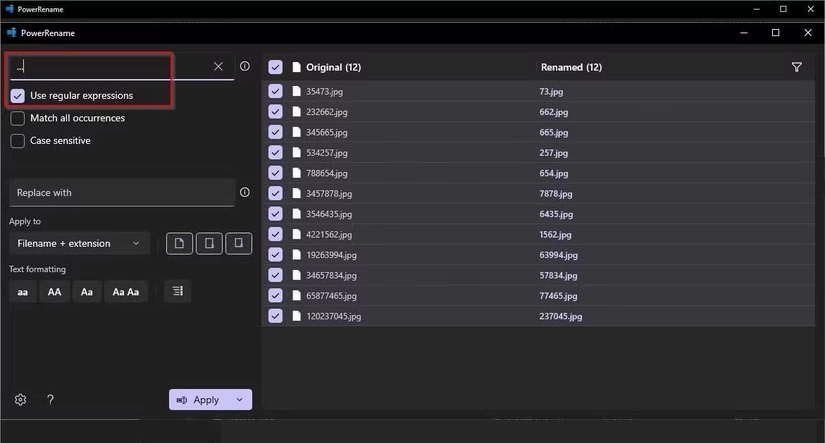
1. Regular Expressions (Regex):
- Enable Use Regular Expressions to use regex for complex renaming tasks.
- Example: Replace all numbers in file names with underscores:
- Search for:
\d+(matches any sequence of digits). - Replace with:
_.
- Search for:
2. Add Text to File Names:
- To add text to the beginning or end of file names:
- Search for: Leave this field empty.
- Replace with: Enter the text you want to add (e.g., “Vacation_”).
3. Remove Text:
- To remove specific text:
- Search for: Enter the text you want to remove.
- Replace with: Leave this field empty.
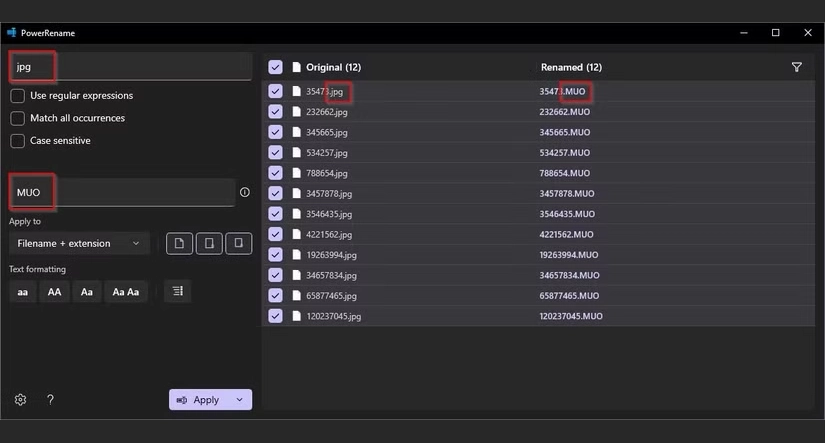
4. Change File Extensions:
- To change file extensions:
- Search for:
\.txt(replace “txt” with the current extension). - Replace with:
.md(replace “md” with the new extension).
- Search for:
5. Enumerate Files:
- To add sequential numbers to file names:
- Search for: Leave this field empty.
- Replace with:
$1_$2(where$1is the original name and$2is the counter). - Enable Use Regular Expressions and set the counter format in the settings.

Step 6: Save and Reuse Configurations
If you frequently use the same renaming patterns, you can save time by reusing configurations:
- Set up your search and replace terms.
- Click the Save button (if available) or note down the settings for future use.
Step 7: Troubleshooting
- Files Not Renaming: Ensure you have the correct permissions to rename the files.
- Regex Errors: Double-check your regex syntax if using advanced patterns.
- Undo Changes: Unfortunately, PowerRename doesn’t have an undo feature, so always preview changes before applying them.
Example Use Cases
- Organizing Photos:
- Rename “IMG_1234.jpg” to “Hawaii_Vacation_1234.jpg”.
- Search for:
IMG_. - Replace with:
Hawaii_Vacation_.
- Cleaning Up Downloads:
- Remove “download” from file names.
- Search for:
download. - Replace with: (leave empty).
- Batch Renaming Project Files:
- Add a prefix to all files in a folder.
- Search for: (leave empty).
- Replace with:
ProjectX_.
Below is a great video guide!
Conclusion
PowerRename is a game-changer for anyone who needs to manage large numbers of files efficiently. With its intuitive interface and powerful features like regex support, it’s a must-have tool for Windows users. Once you get the hang of it, you’ll wonder how you ever lived without it!
Let me know in the comments if you have any questions or need help with specific renaming tasks!
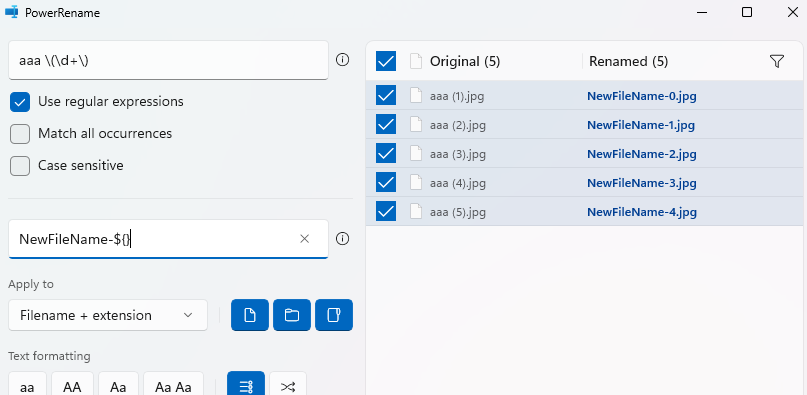
How we fully rename a group of files
For starters put all of the images/files you want to rename in a single folder. Select all of them and name them something simple, like “aaa.”
This will end up with a gross looking list like as follows.
- They will look like this
- aaa (1).jpg
- aaa (2).jpg
- aaa (3).jpg
- aaa (4).jpg
- aaa (5).jpg
You get the idea. So then in PowerRename your Search will be “aaa (\d+)” and your Replace With will be “NewFileName-${}”, be sure to have Use regular expressions checked. This will rename the files, giving them a number at the end and remove the (x) from the name.